Contacts

How to add and manage your contacts

Add and Manage

Contacts

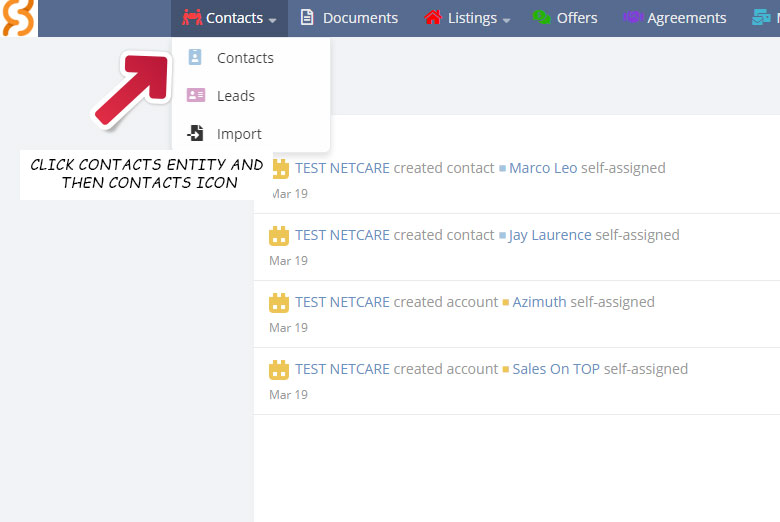
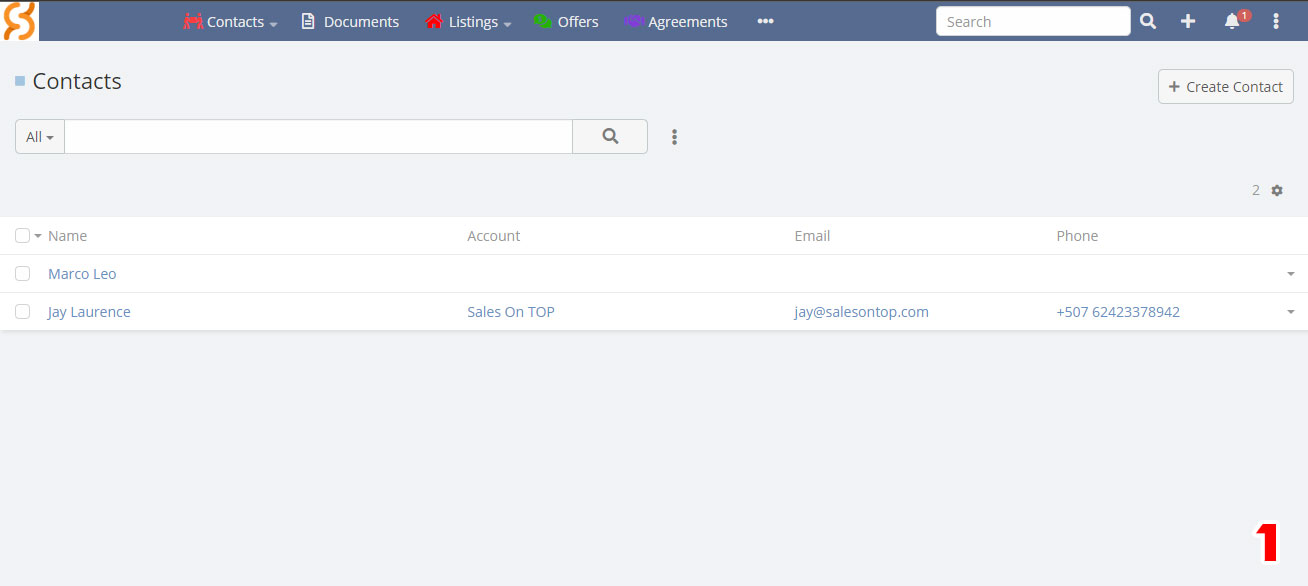
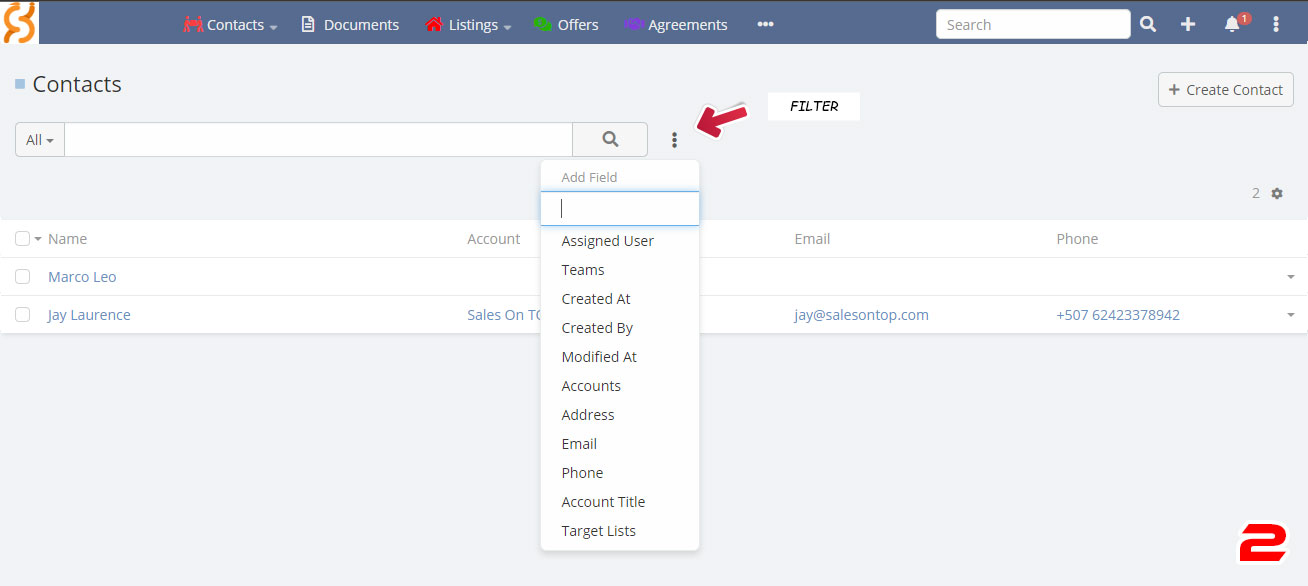
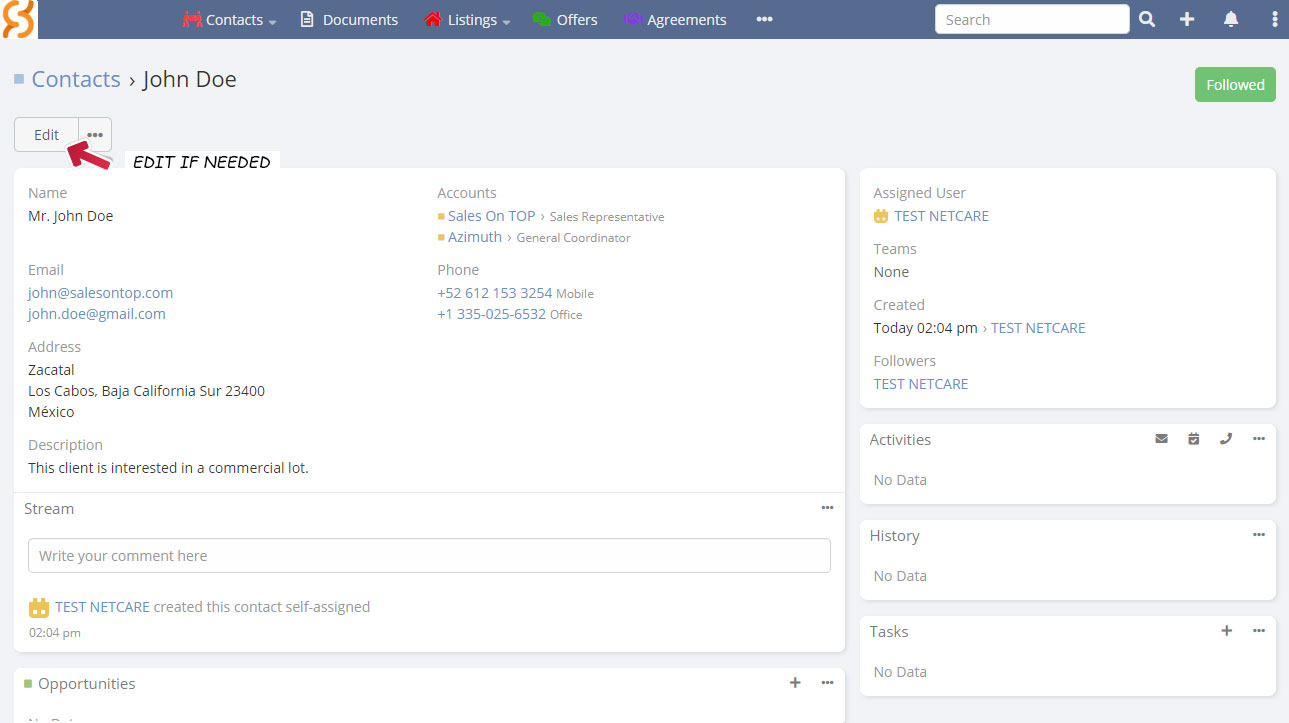
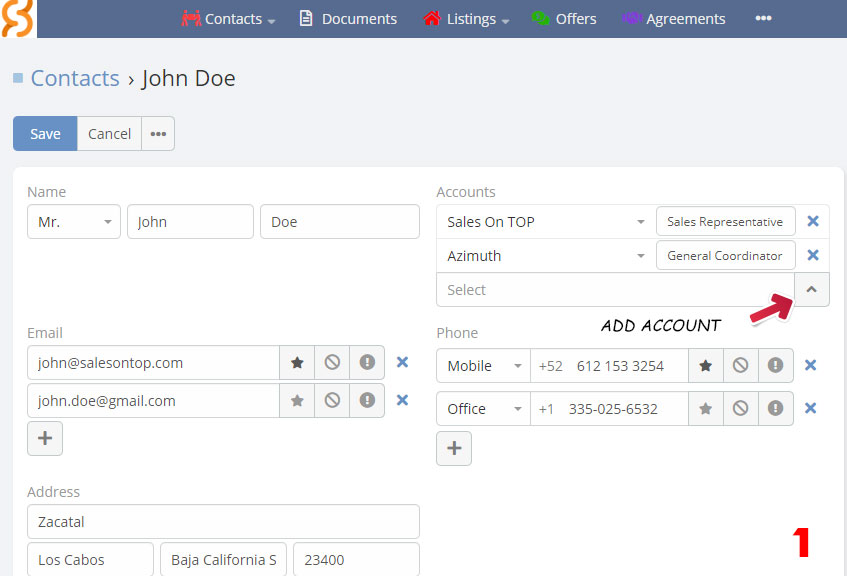
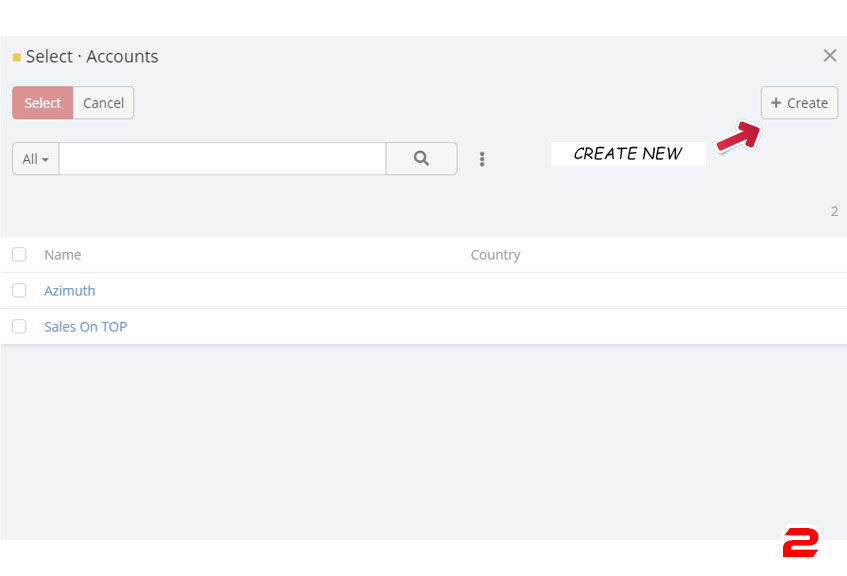
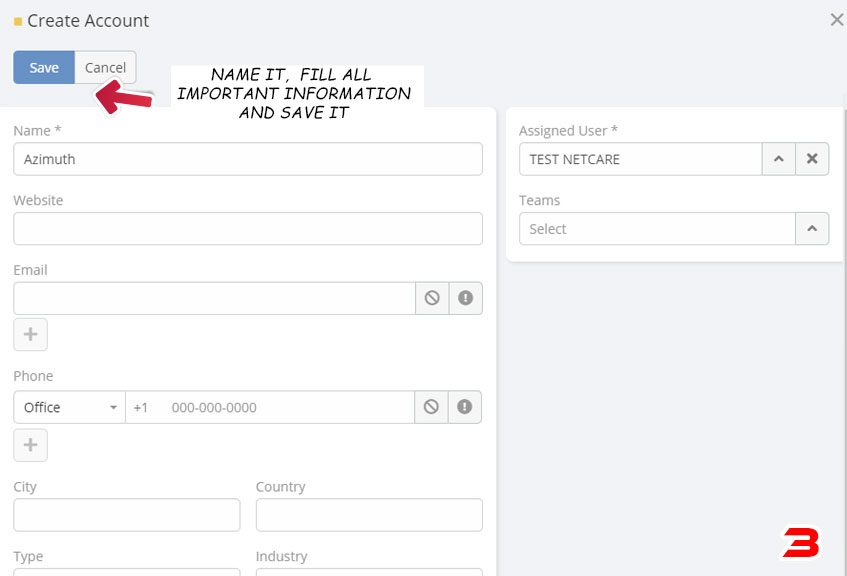
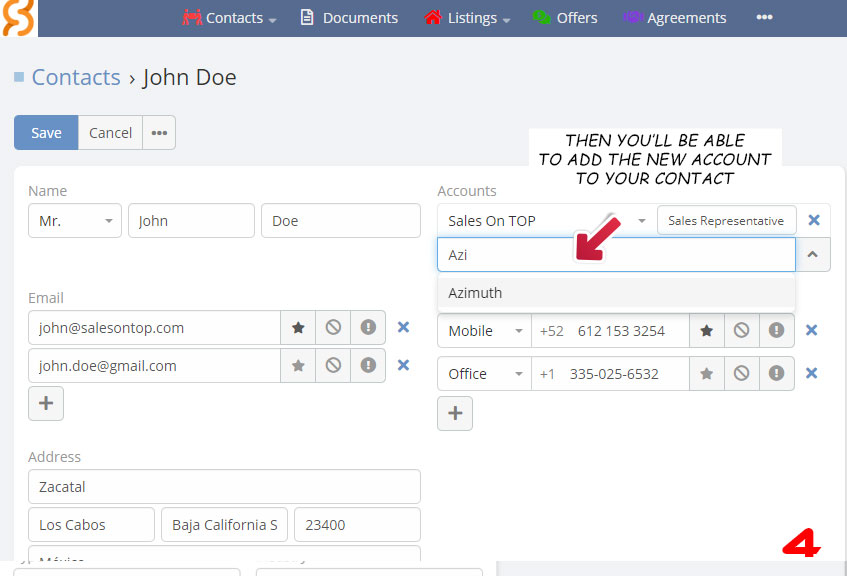
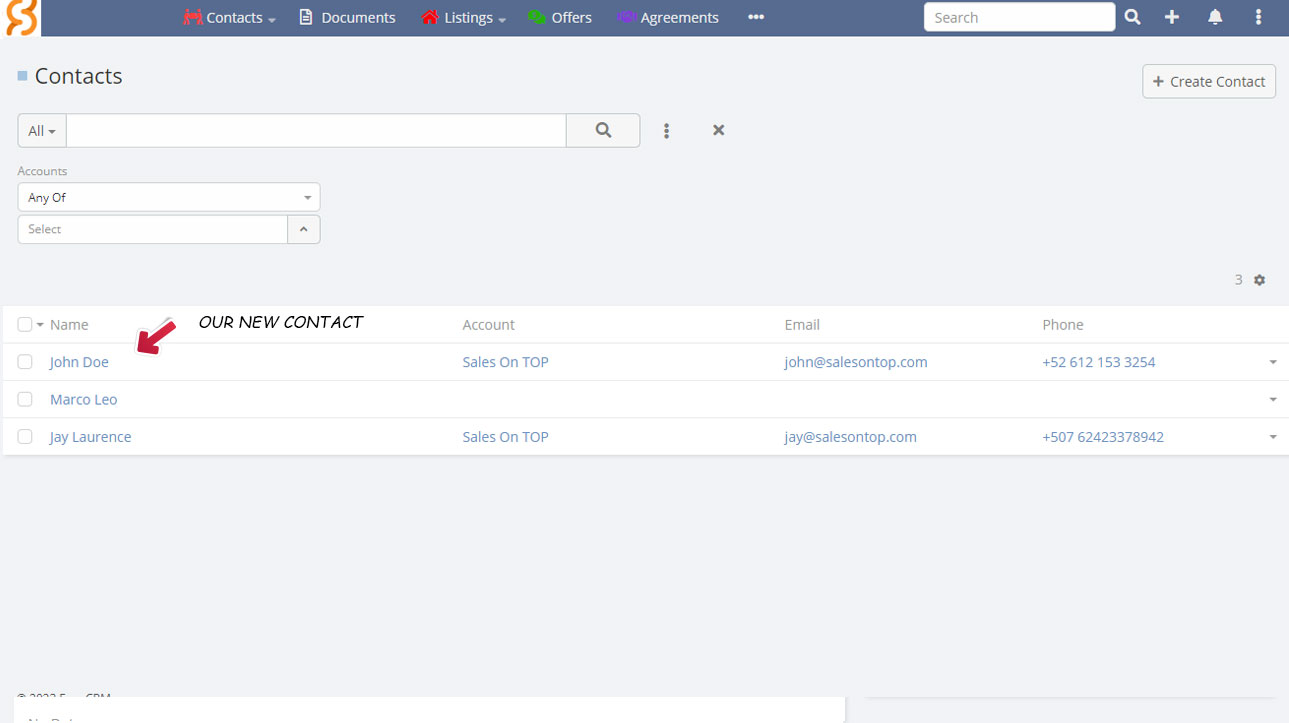
With this guide, we are going to learn how to add and manage contacts to have all the information you need of them. Additionaly you’ll have an option to manage your prospects wich come from your website forms with the possitibilty to add them manually.

With the following steps you’re going to get familiar
with every option you have to add and manage your contacts.

  1. Main Screen: Here you can find a reach bar, filter, create contact button and your contact list.
  2. Filter: Once you have multiple contacts added, it’ll be easier to find one specific using your filter.
  3. Create Contact: finally, here you have the button to start creating your contacts.

There is plenty information to add when you start creating a contact, here in the next points you’ll see where is each field to fulfill.

  1. Name
  2. Accounts (Company): you can add multiple accounts to your contact, you must add them manually (we’ll explain it later)
  3. E-mail: you can add more than one too with the option of making one their favorite way of contact and the option to “opt out” another temporary.
  4. Phone Numbers: Same as E-mail, you can add multiple phones and indicate if there are mobile, office, etc.
  5. Address.
  6. Descriptions: Here you can add any note and information related to the contact.
  7. Assigned User: The one who’ll manage this contact.

With all the information filled correctly, you must Save your contact, so you can see it next in your Main Screen.

Once you have added your contact and you notice there is information that could be added wrong, or just need to be changed. You can Edit the contact as you please, also we’ll see how to add the Account (company) information that is very important too.

Accounts (Company)

Contacts

After you clicked on the Edit button, you’ll have again the posibility to keep changing/adding information to your contact, as we mentioned earlier, Accounts are very important information that must be added manually, so you can differentiate or even filter contacts when needed.

After you clicked on the Edit button, you’ll have again the posibility to keep changing/adding information to your contact, as we mentioned earlier, Accounts are very important information that must be added manually, so you can differentiate or even filter contacts when needed.

Follow this steps so you’ll be able to add accounts for your contacts.

  1. First you’ll have to click on the arrow pointing up at the Accounts fields
  2. Next you’ll look for the “+ Create” button to the upper right of the popped screen
  3. You must fulfill every information need of the account and then save it
  4. Finally you’ll be able to add multiple accounts and position to your contacts.

This’ll be very helpfull when you have multiple contacts, maybe with repeated names, cities, etc… so using the filter by accounts it’s going to make it easier to find them.

Finally, you’ll have your Contacts Main Screen loking like this, with your recently new added contact.

Already getting used to it?

You can explore what else we have to offer, you can go back to the CRM index.

Scroll to Top