The reports are very important because their are going to be necessary to create marketing campaigns.
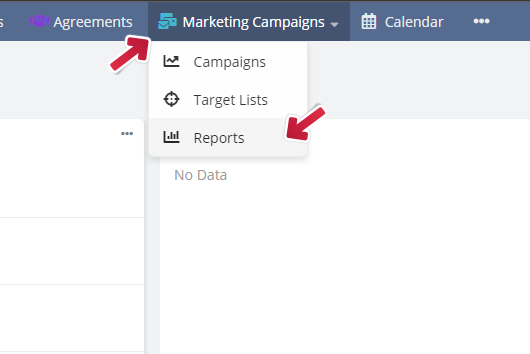
The first thing is to head to the Marketing Campaigns Entity and select the Reports tab.
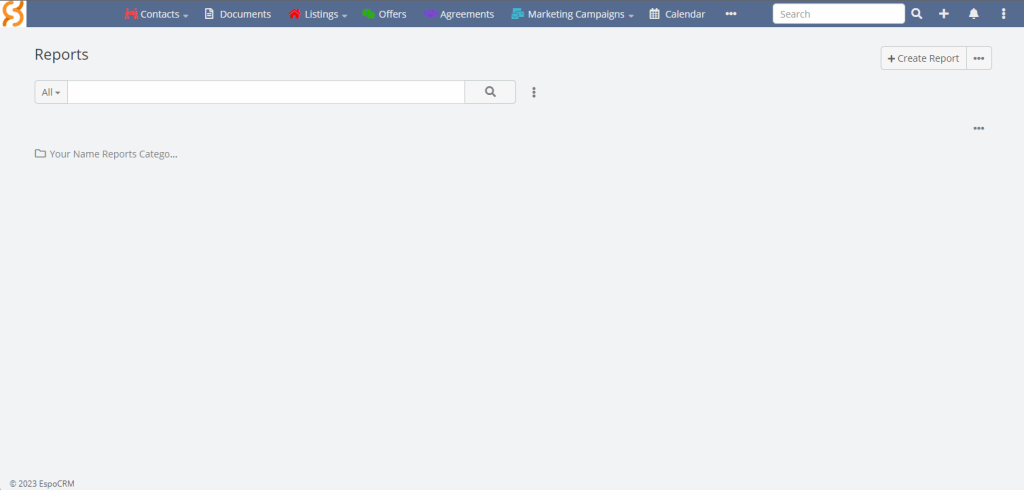
Once in there, you’ll see the entire Reports screen to navigate and the tools necessary to start creating them.
Report Categories
Create Reports
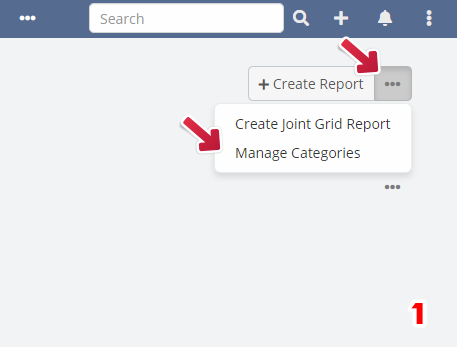
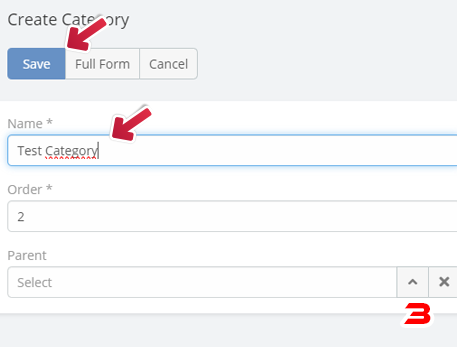
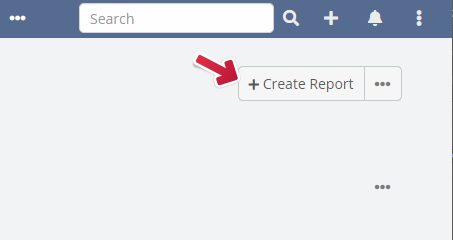
The first time we are going to create a report, we must create a “category” first. So, the next step you need is to head the three dots next to the button “+ Create Report” and then click on “Manage Categories“.
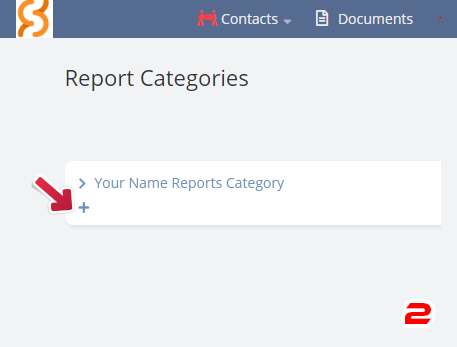
Once at manage categories we click on the plus icon and fill the fields needed.
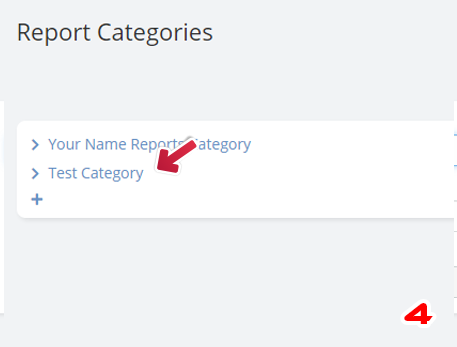
This is very simple so you can further add that category to your reports created, remember that it’ll be something usefull to identify diferent reports once you have a variety of them.
When you finally go in your new category, you can start creating a report.
You are going to be able to use one report for multiple marketing campaigns.
Creating Reports
Create Reports
Lets create our first report.
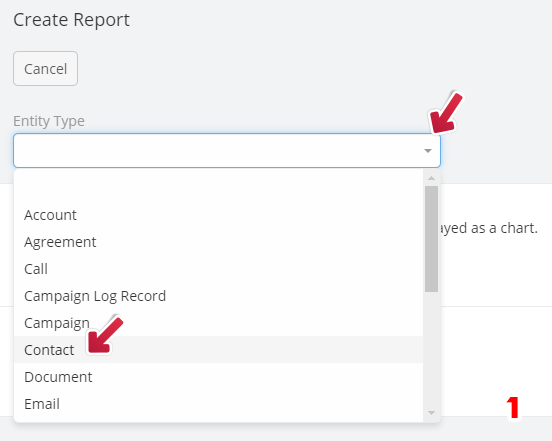
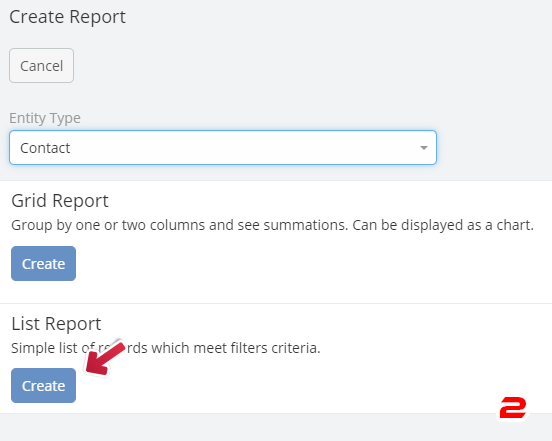
First thing to do is to choose an Entity Type for our report. In this case we are going to create a report over our contacts. Once we choose the entity we must click on List Report “Create”.
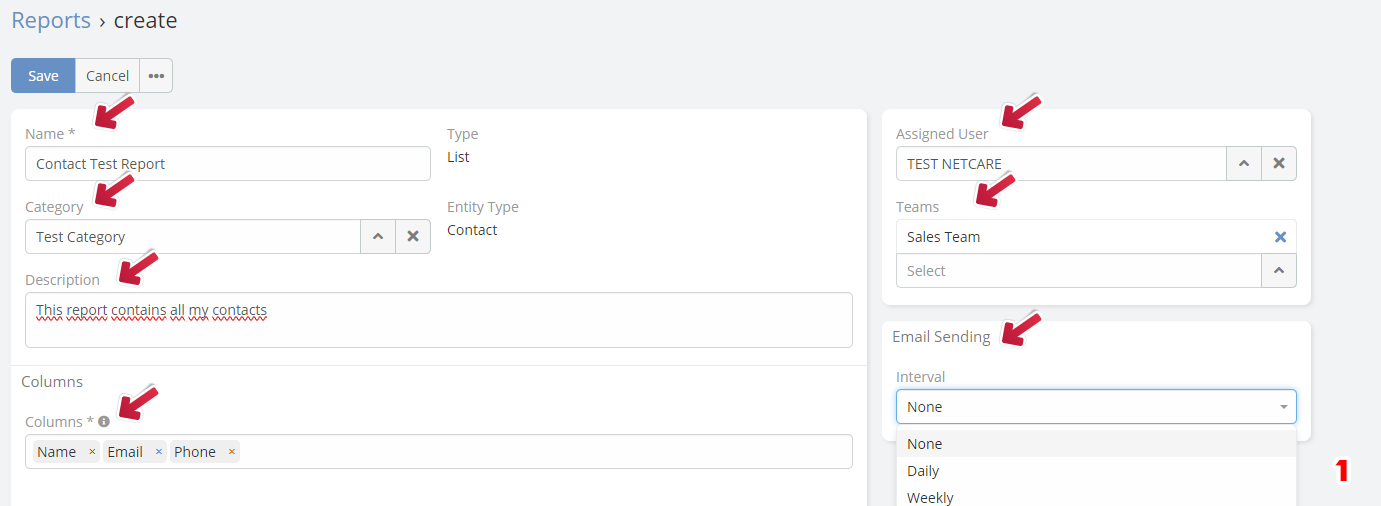
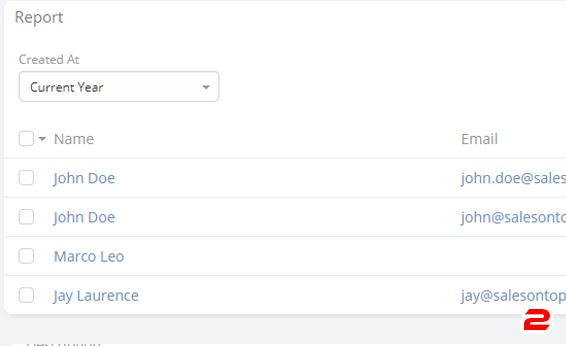
In the next screen we are going to fill basic fields that are usefull to have information about of the report. The most important one for marketing campaigns is the E-Mail that must be filled on columns.
By default we have “Name” and we must add at least “E-mail”… additionally you can add further information like Phone, Address and more.
In this screen, you must Assign your User so the report can be linked to your account. Also you can select the Team and the Interval Email Sending, from none, daily to even yearly.
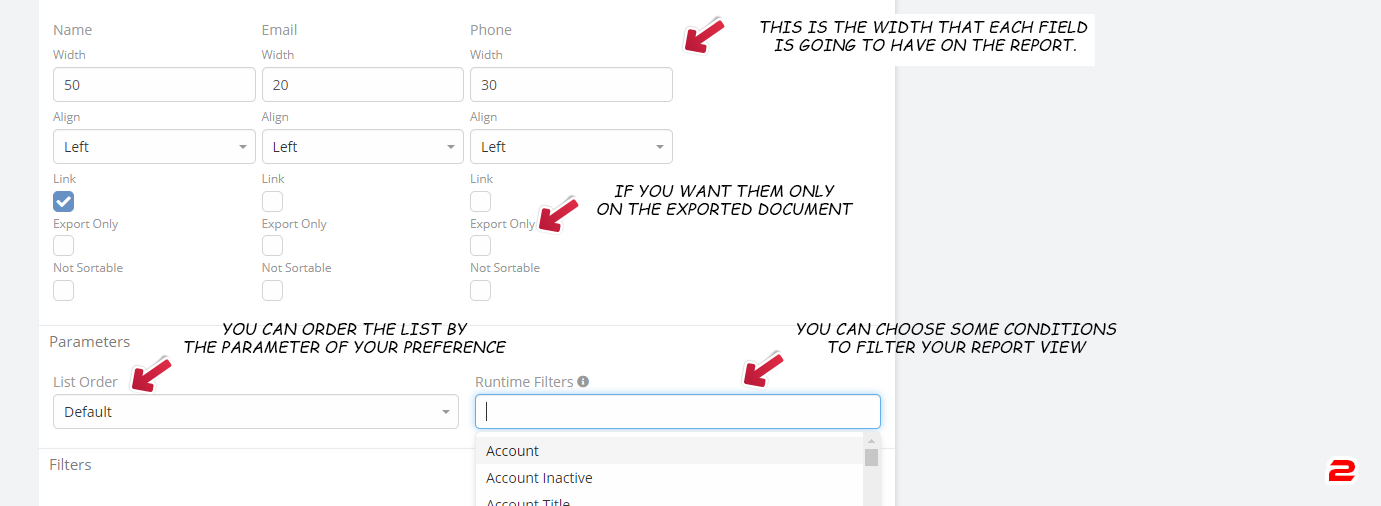
In the second part of the screen we have some other options, the first one are the width you can set for every field you have, this is made by percentages so you can adjust to your preference.
Also, you can click on the options like, if you want to have a link on each field or if you want them to be present once you “Export” the document, with the “Export Only” option.
Additionally you have the option to order your list by some parameters of your preference and to filter the information if you want to see some exclusive data from the report view.
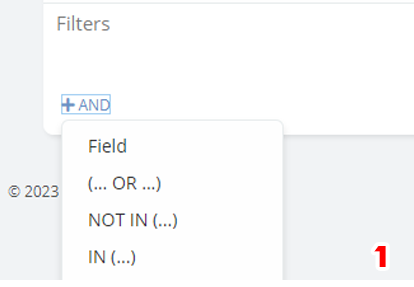
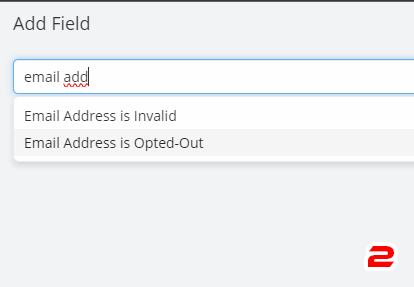
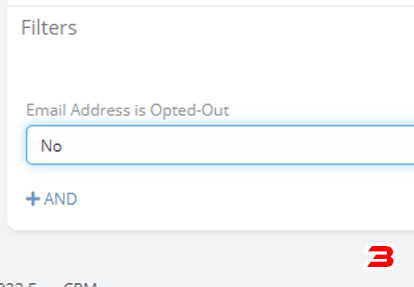
Last but not least, you have the option to add filters so you can remove specific information that it’s not usefull for you, like adding a filter for “E-mail Address Opted Out“, so you are going to filter out those contact which their E-Mails are not working anymore for some reason.
How is this usefull? if the client doesn’t want to receive that kind of information, we must chose this filter so he wont be part of the Marketing Campaign once they have their E-Mail Address opted-out.
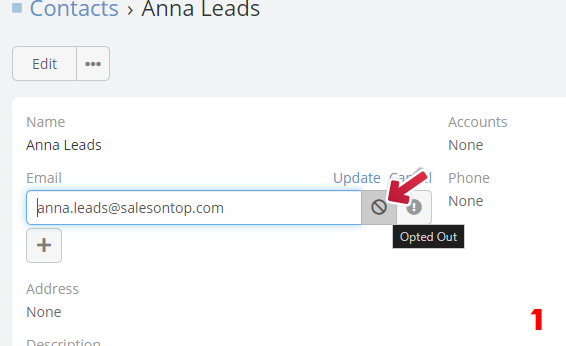
This is a little example of how you can opt out the e-mail of one of your contacts and it wont be part of your report for your Marketing Campaigns.
Already getting used to it?
You can explore what else we have to offer, you can go back to the CRM index.