One very important thing for this, it is that you are going to need a document with CSV extension. Which should have at least 2 fields in columns with “Name” and “E-mail” so it should be added correctly once you upload to the platform.
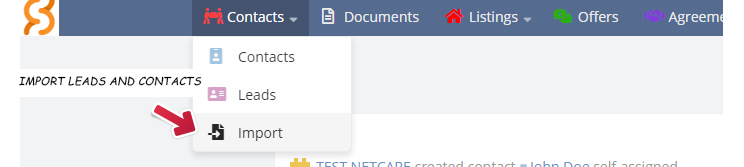
Once you have your document prepared, let’s head to the Contacts entity and look for the “Import” icon
There is a few steps to import the contacts and it’s very simple yet important to know them.
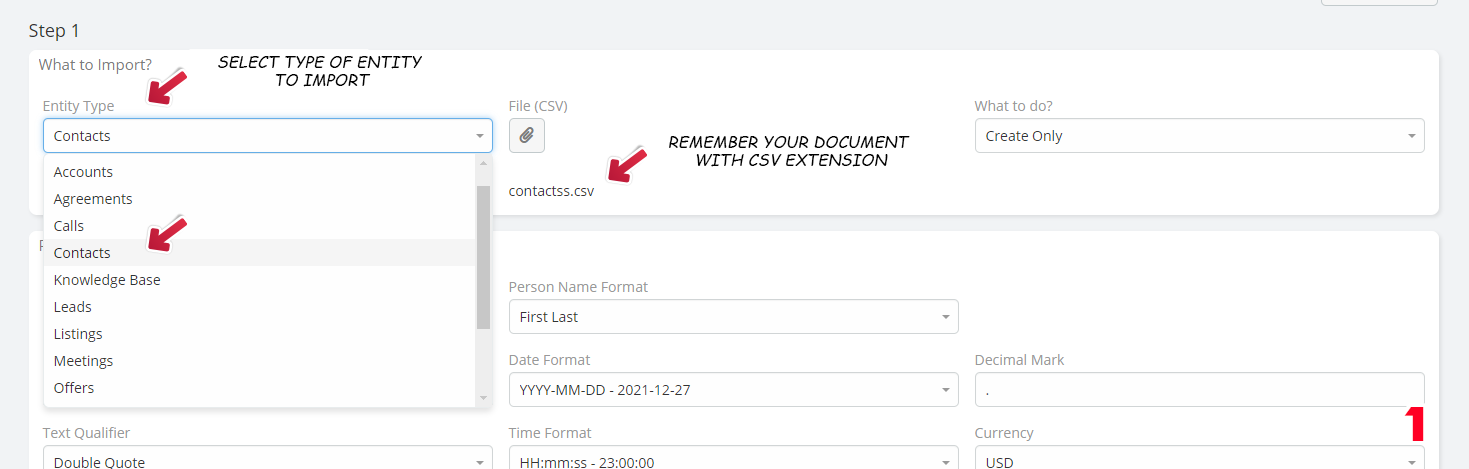
1. First, you have to selet the type of entity you are adding, in this case we select Contacts from the Entity Type and upload your CSV – UTF-8 document.
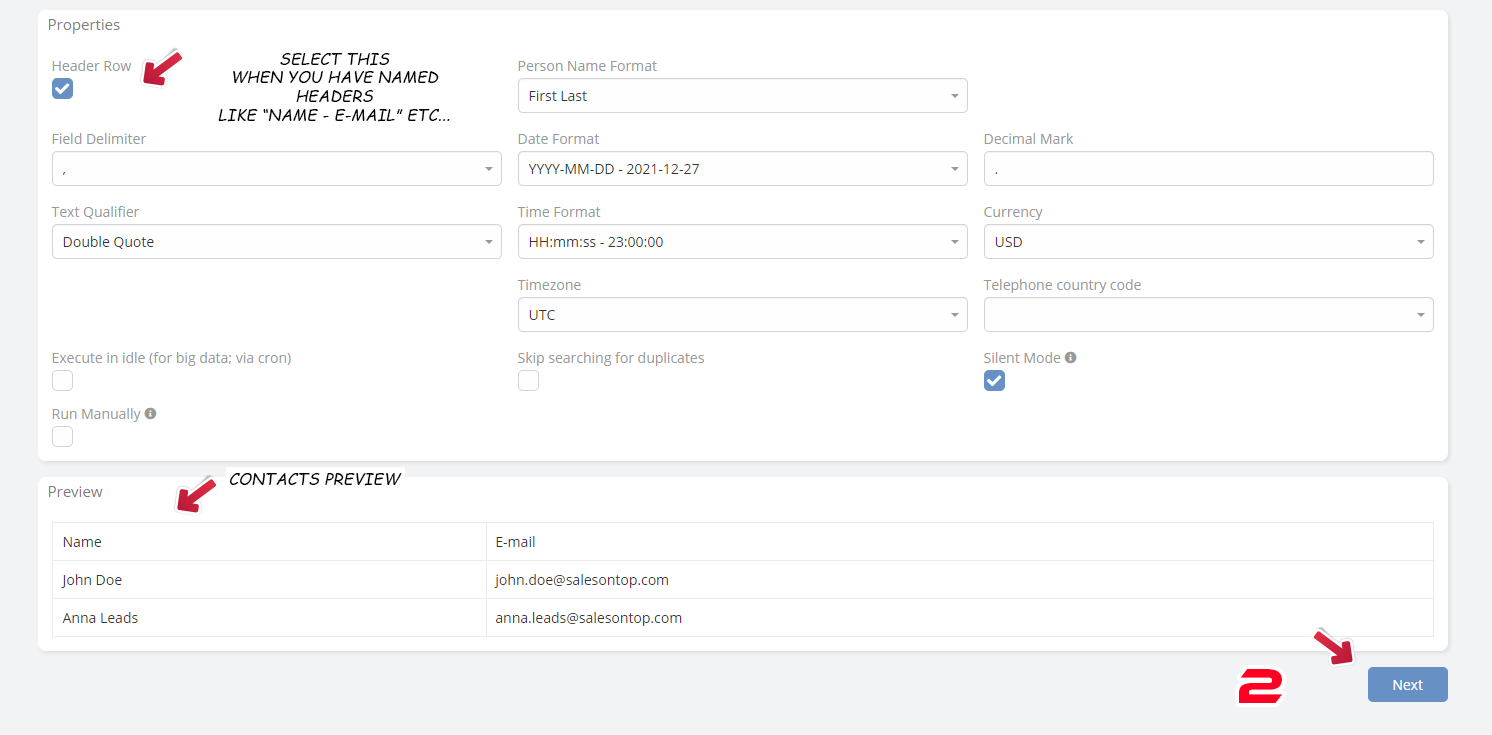
2. Then you have the properties that it’s not always necessary to modify as they are, by default, selected with the needed data. There you have an option to select your “Header Row”, when you have at your document a row with the name of each column, like “Name, E-mail, etc…”
3. Once you added your document succesfully, you’ll have a preview that shows how the information is going to look and you have to select the field of your data, like in this case you can select E-mail for the e-mail rows on your document.
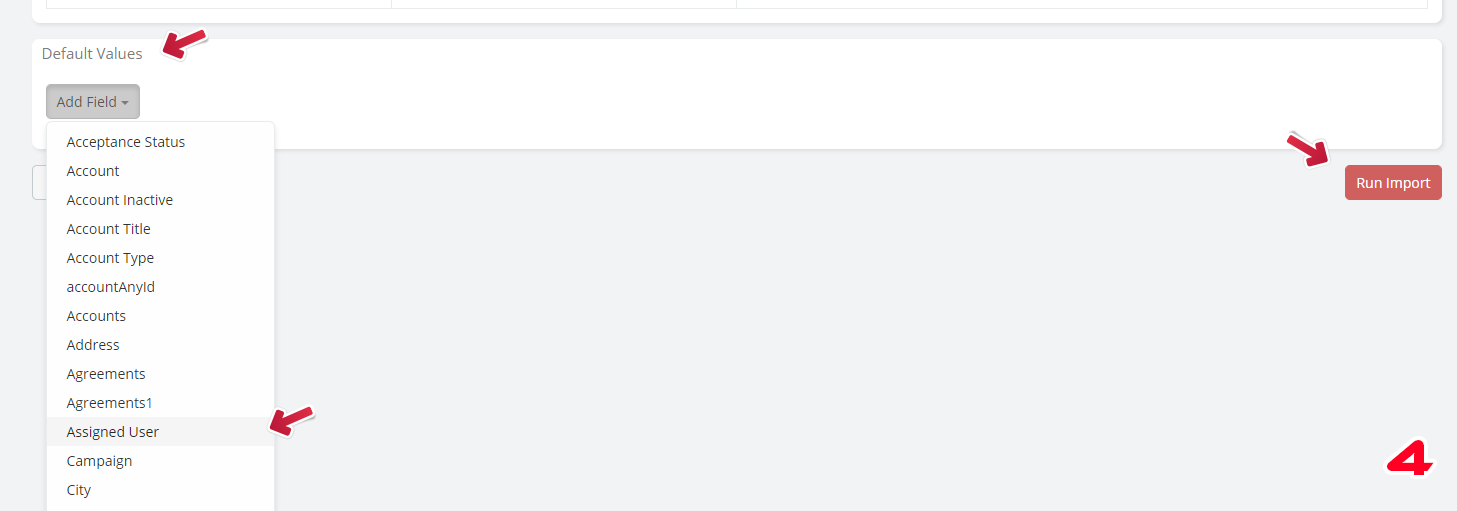
4. There is also a very important value from“default values”to select called“Assigned User”.This will match the information to your user so you can check it out later. Finally selecting Run Import
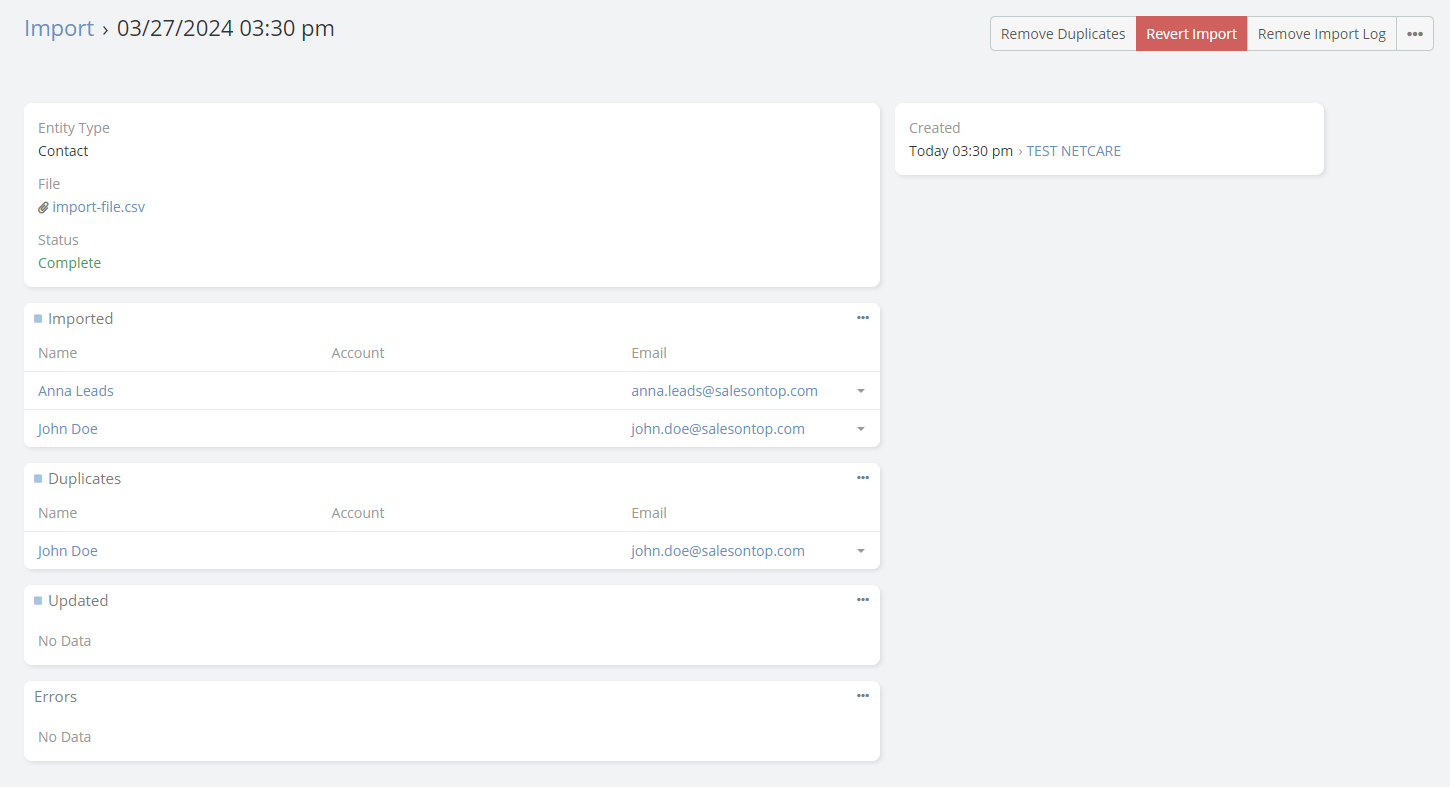
Finally you’ll have this screen where you can verify if everything went correctly.
At the end you’ll have the option to see the contacts added in your contact section. Remember that you can manually add, remove or modify any information needed on the new contacts.
Already getting used to it?
You can explore what else we have to offer, you can go back to the CRM index.